
This guide walks you through setting up your sender profile step by step. It is important that you set up a sender profile, as it is mandatory in Heyloyalty in order for you to send emails. The sender profile is used as sender information when you send emails or SMS messages.
At the end of the guide, we will explain how to validate your sender profile so you can send to more than 10 recipients.
Set up your sender profile
Create your sender profile by clicking Settings → Sender profiles
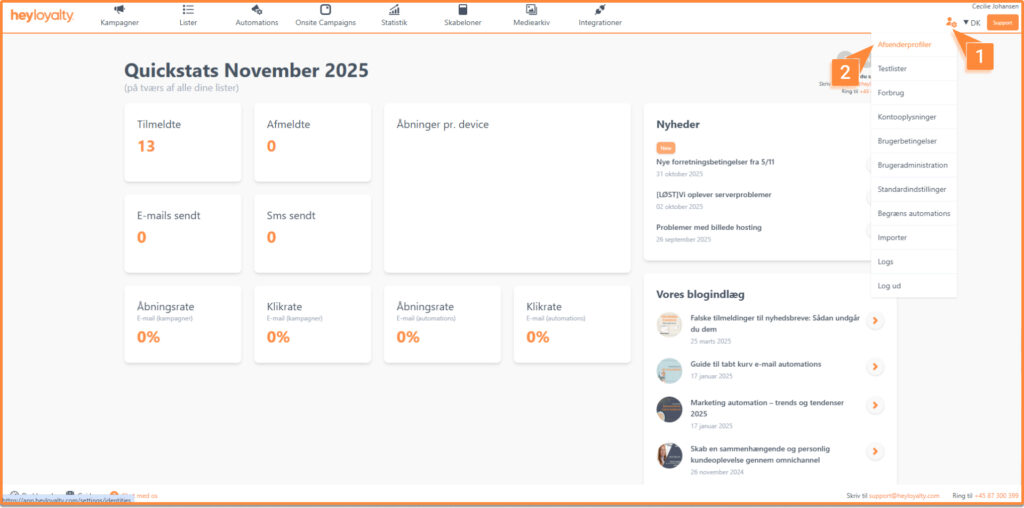
–< 0 > Create new sender.
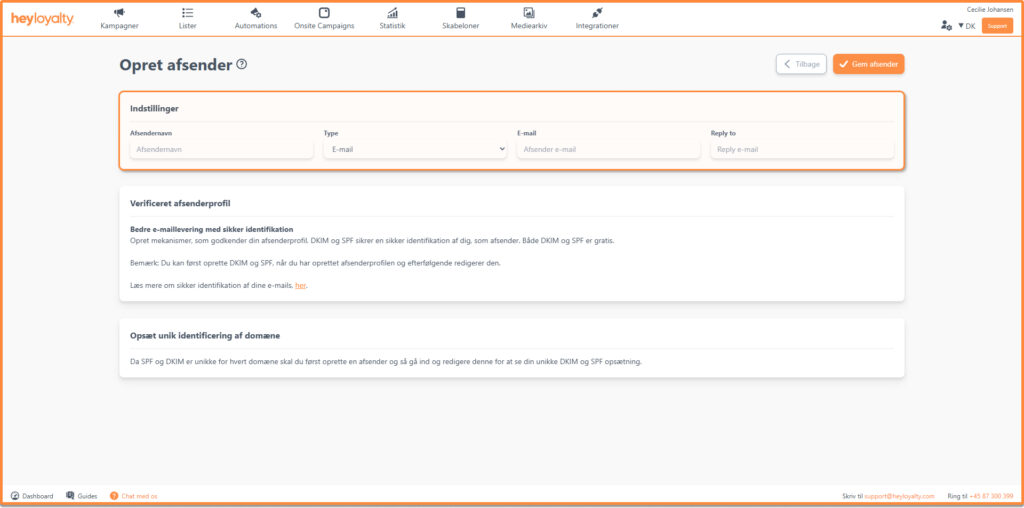
Fill in the information.
- We recommend that you give the sender name a personal touch.
- Type: Here, you choose whether the sender profile should be for email or SMS. If you want to send both emails and SMS messages, please note that you must create two separate sender profiles—one for email and one for SMS.
The SMS sender name must be between 3 and 11 characters. The sender name cannot exceed 11 characters because the full name will not be displayed in the recipient’s email client.
- Email is the email address that your recipients will see as the sender of the email. Here too, it can be a good idea to create a personal email address. To avoid flooding one of your employees’ inboxes with inquiries, autoresponders, etc., consider creating a new inbox that can receive all of this.
- Reply to is the email address that receives the reply by default when a recipient clicks ‘Reply’ on one of your newsletters. In principle, this email address can be different from the sender address, although we recommend using the same email address.
Finish by clicking Save sender.
Validate sender
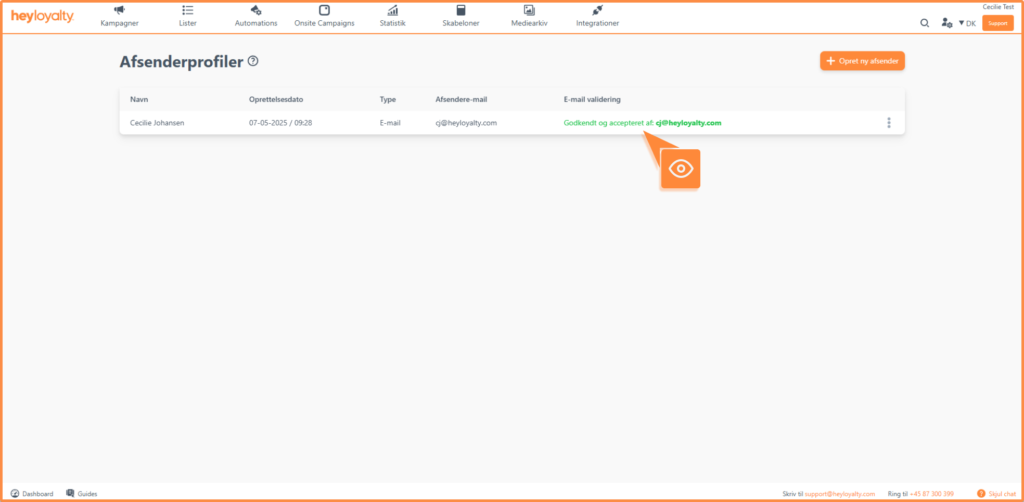
After you click Save sender, you will receive a confirmation email where you need to approve the sender profile. Once you have approved the sender profile, you will be able to see it under your sender profiles.
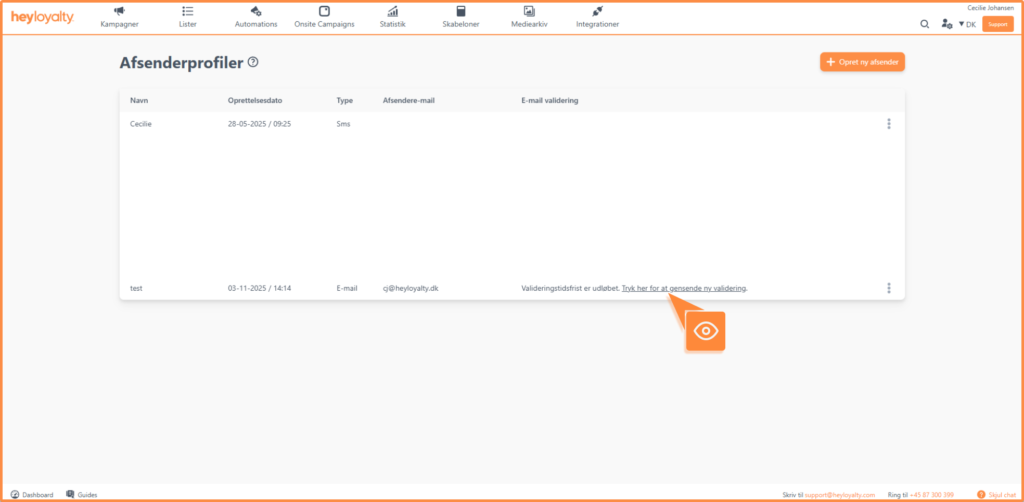
If you didn’t approve your sender profile in time, you can resend the confirmation email. To do this, go to the sender profile and click Click here to resend validation.
DNS setup
In order to send valid emails, your sender profile must be verified. You can do this by setting up DKIM and SPF, which are used to confirm that the sender profile is valid and belongs to your company. This setup also ensures that Heyloyalty’s server providers can send emails on your behalf without any issues. It also reduces the risk of your newsletters ending up in recipients’ spam folders.
You can now access both SPF and DKIM information on the sender overview. If you have an IT administrator at your company, you can send an automatically generated email to that person by clicking ⁝ → Send DNS.
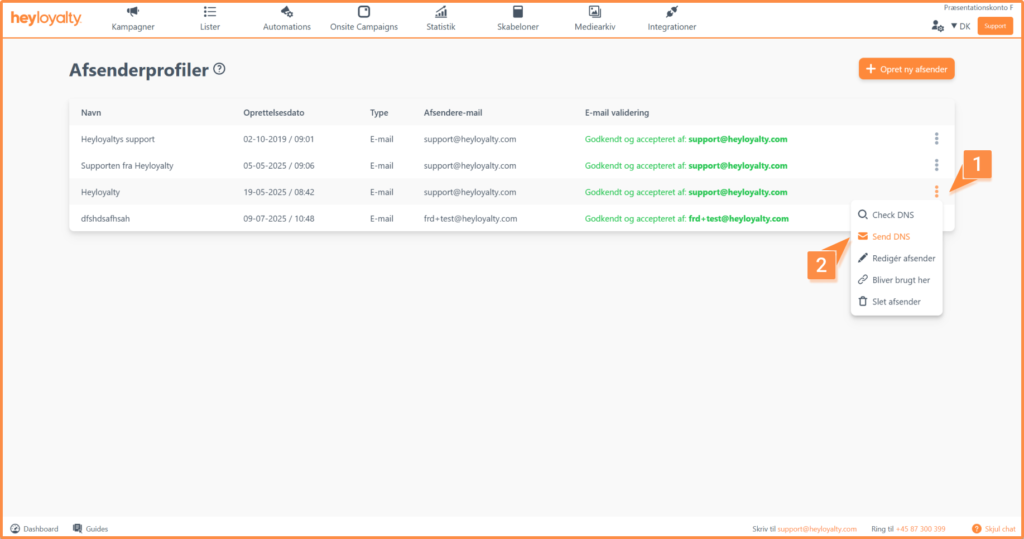
Fill in the name and email address of the IT manager. They will receive the email below with exactly the information they need to verify your sender profile.
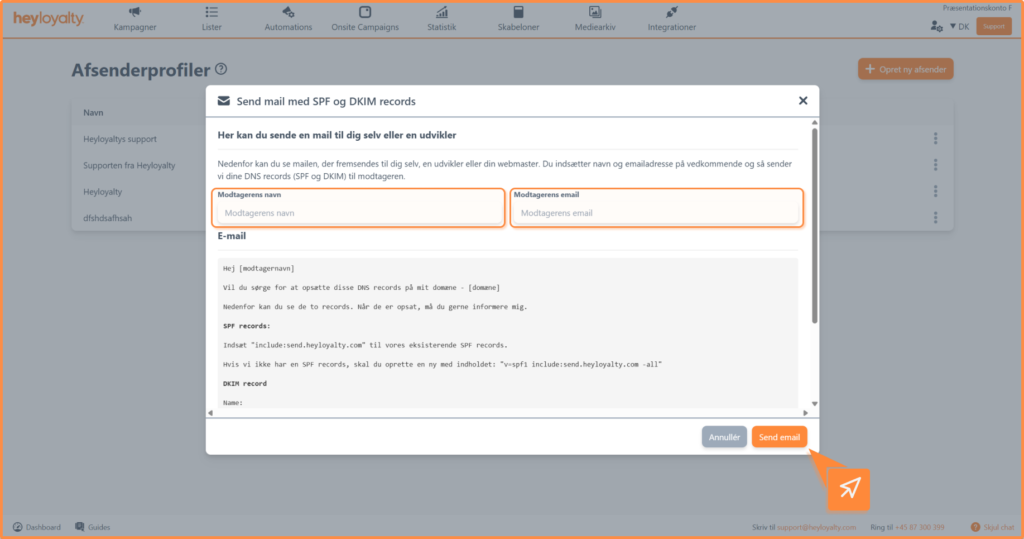
Send the auto-generated email by clicking Send email.
Once SPF and DKIM have been set up, you can check whether the setup has gone through and been done correctly by clicking ⁝ → Check DNS.
A red or green bar now appears at the top, telling you whether the setup has been done correctly:
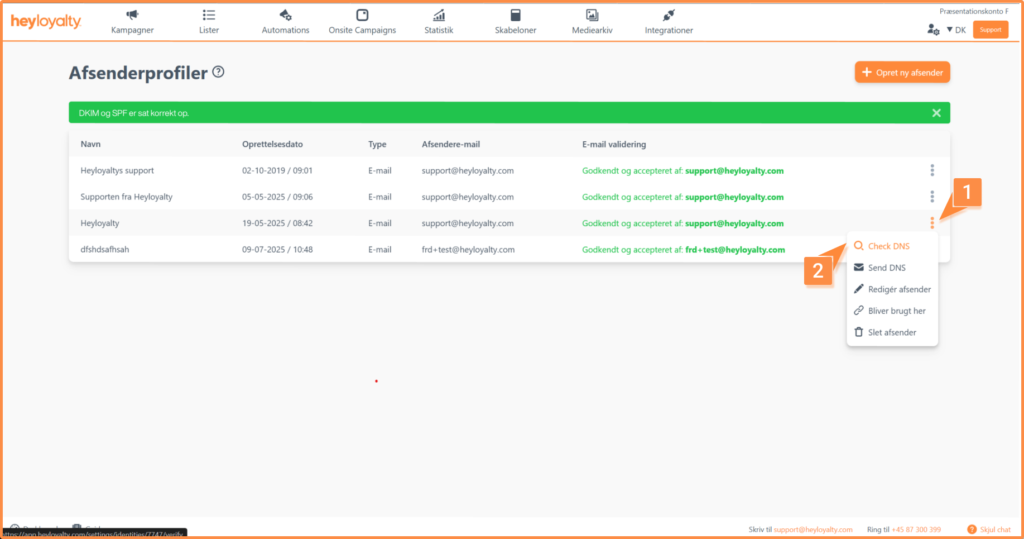
If it says DKIM and SPF are set up correctly, you are now ready to use the sender profile and can send both campaigns and automations in Heyloyalty.
Overview of your sender profile
Here is an overview of the sender profiles you have created:
- Creation Date: When the profile was created
- Type: SMS or email sender
- Sender Email: Which email address is used for the various profiles
Your sender profile has now been created
By following this guide, you have now successfully created and secured your sender profiles. By setting up both email and SMS profiles, you ensure that your messages are delivered correctly and without any issues. Continue exploring Heyloyalty’s features to further improve your campaigns.

If you need information or help that you cannot find here on the guide site, you are always welcome to contact our support!
support@heyloyalty.com