Transactional emails are emails that are sent based on a transaction (in the broadest sense of the word). In this context, a transaction can be a completed purchase, the creation of a member, an update of a member, a change of order status, etc.
For clarity, we divide transactional emails and their use cases into two categories. Whichever of the two you use, you can send an email and/or an SMS.
1. An SMTP service Use an SMTP service to send transactional emails. It requires less technical insight to set up, but offers less design freedom. Use Heysender*. Many companies use an SMTP service to send transactional emails in connection with purchases in their webshop (order confirmation, change of order status, etc.). It is quick to set up, but it is more difficult to change the design and/or text afterward. If you have a webshop, an SMTP service will often be built into your shop system, but you may have the option of setting up your own with another provider, e.g., Heysender. The entire email is written as HTML code, and you do not have a drag-and-drop editor as you know it from Heyloyalty. All changes to the email must therefore also be made in the HTML code.
These messages can be sent to recipients who are not on your list in Heyloyalty.
*Tip: Heysender is an add-on in Heyloyalty that makes it easy to set up an SMTP service. Heysender also acts as a log, allowing you to monitor the delivery of your transactional emails. This is a SIGNIFICANT difference compared to the standard SMTP services that various webshop systems set up for you. With Heysender, you can search the log and see exactly which email address a given email was sent to and whether it was delivered. So when a customer contacts your customer service and says they never received an order confirmation, you can check whether that is correct. Read more about Heysender here.
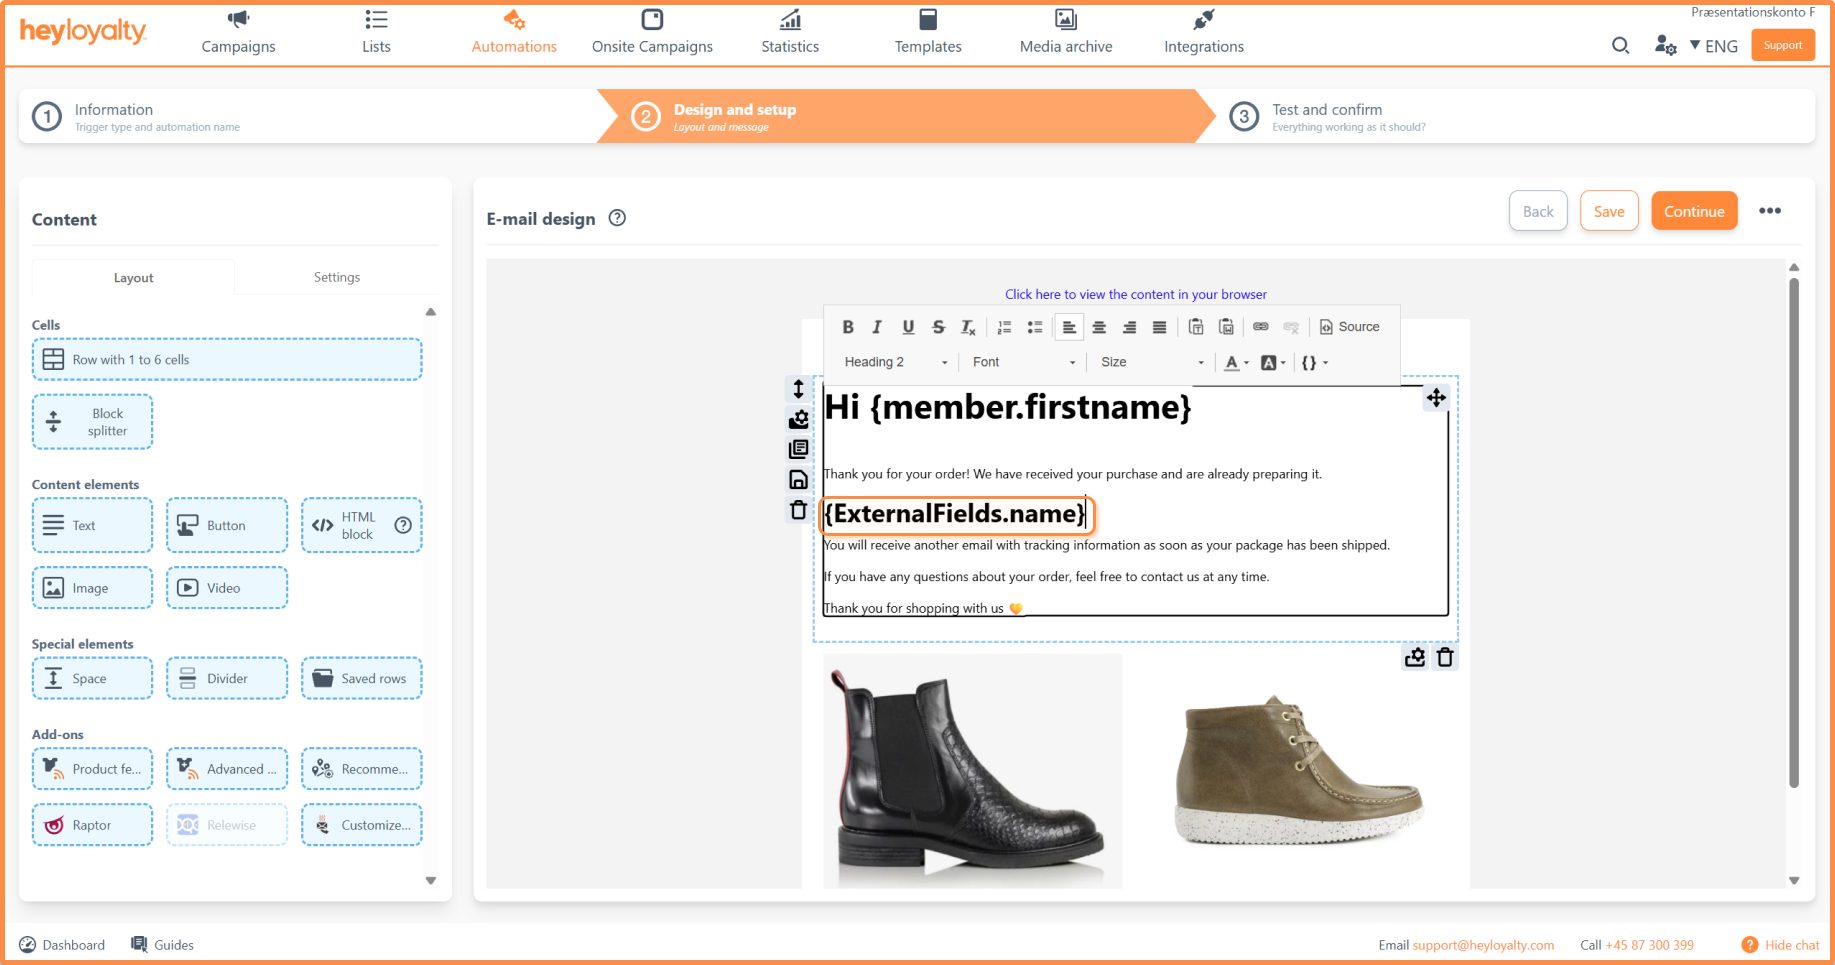
2. Using webhooks Set up webhooks to send data from one system to another (e.g., from your CRM system to Heyloyalty). This approach gives you more design freedom, as the transactional email can be set up and designed in Heyloyalty the same way as campaigns and automations. You can then merge content from the transaction into the email using merge fields in Heyloyalty’s email editor. Note that these differ from the normal merge fields in Heyloyalty, because you must type the merge field manually in the email in Step 2 – Design and setup. For example, if you want to merge the recipient’s name, the merge field would be something like {ExternalFields.name} or {ExternalFields.firstname}. The exact merge field depends on how your JSON object is structured, so we cannot describe it precisely in this guide.
These messages can be sent to recipients who are not on your list in Heyloyalty. However, this depends on what you send as the unique key and what other requirements you set. A developer can read more about this in the API documentation above.
Set up and use an integration with webhooks
To be able to send transactional emails in Heyloyalty, you need to set up custom triggers that use webhooks to trigger an email.
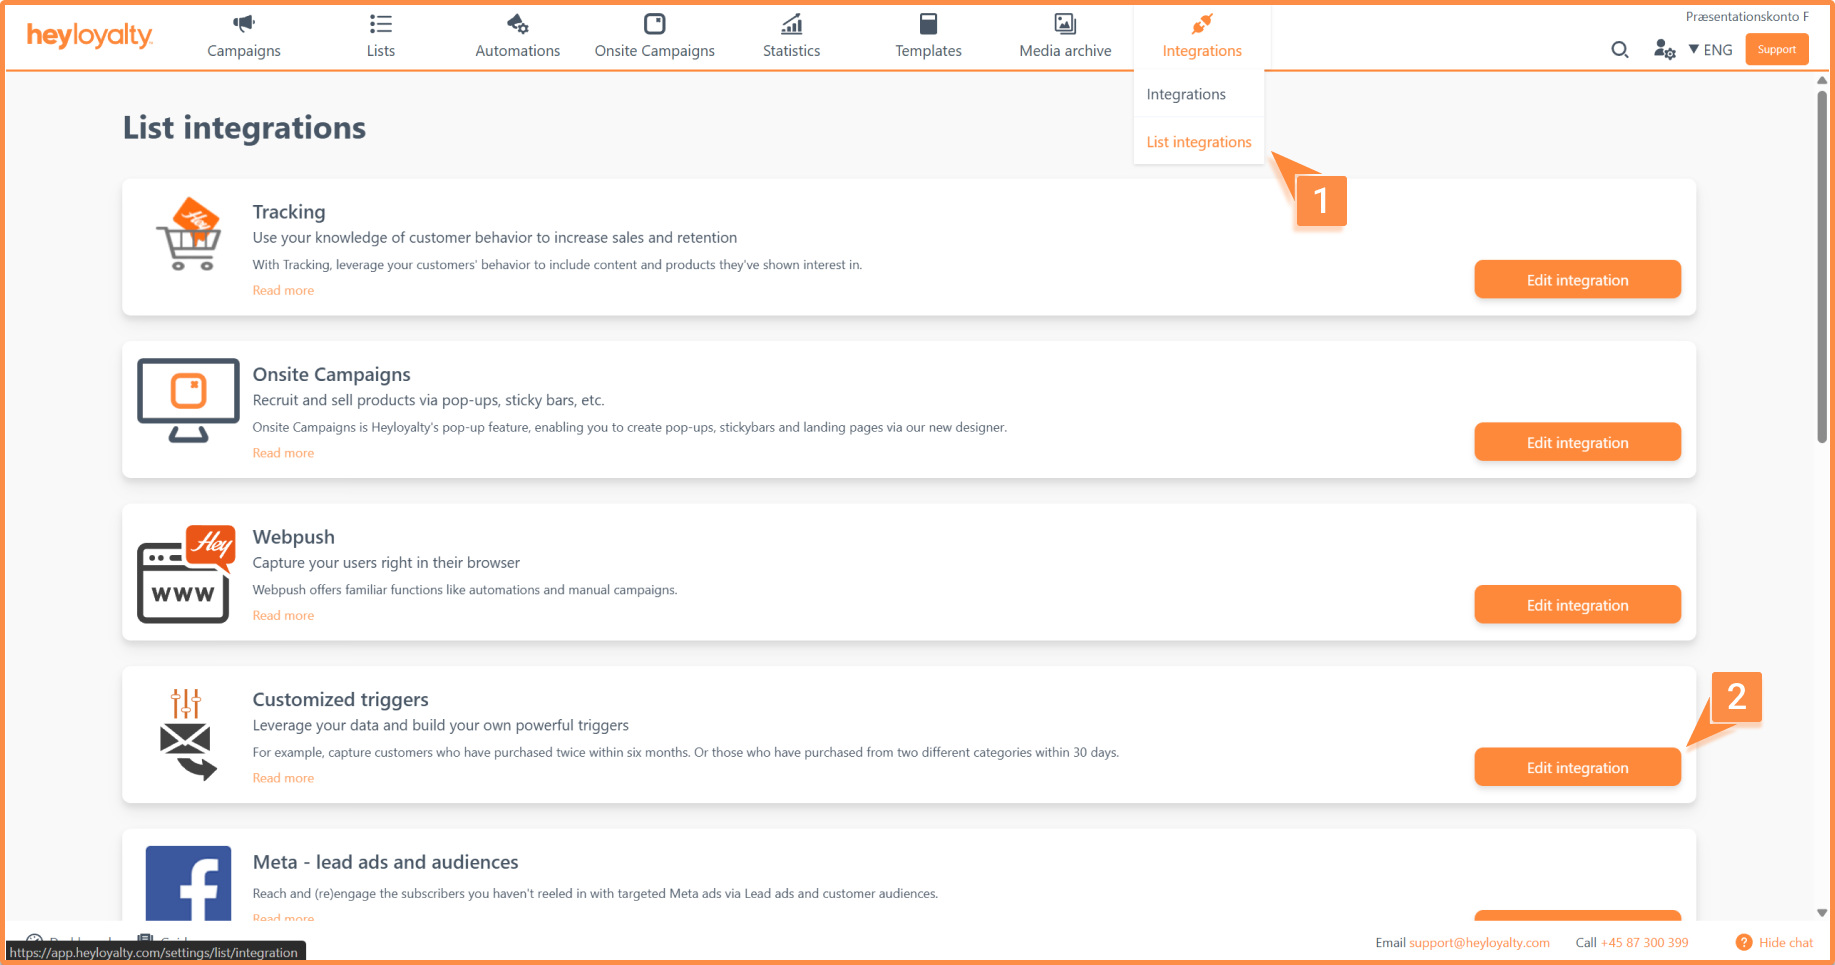
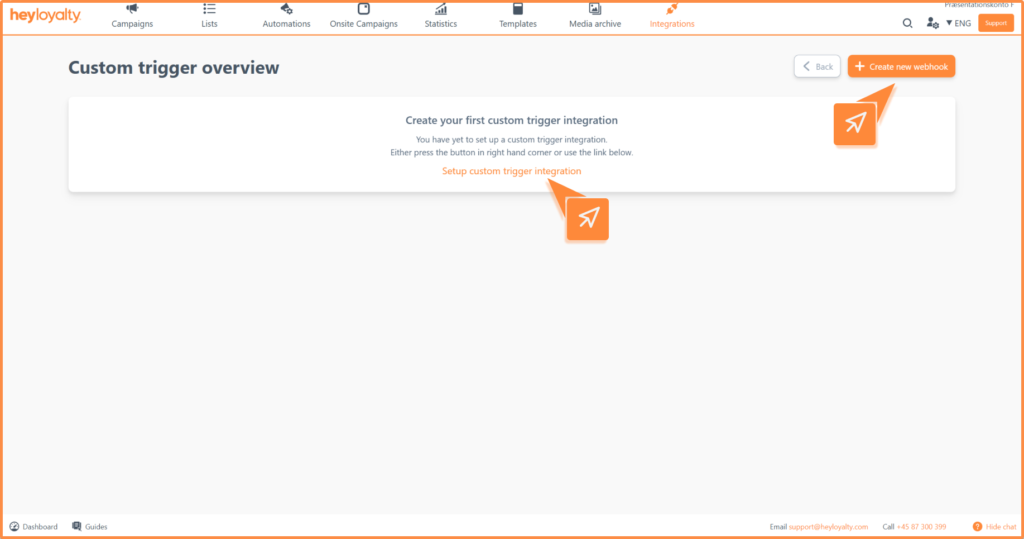
Click Integrations → List Integrations → Customized triggers → Setup integration → Create New Webhook.
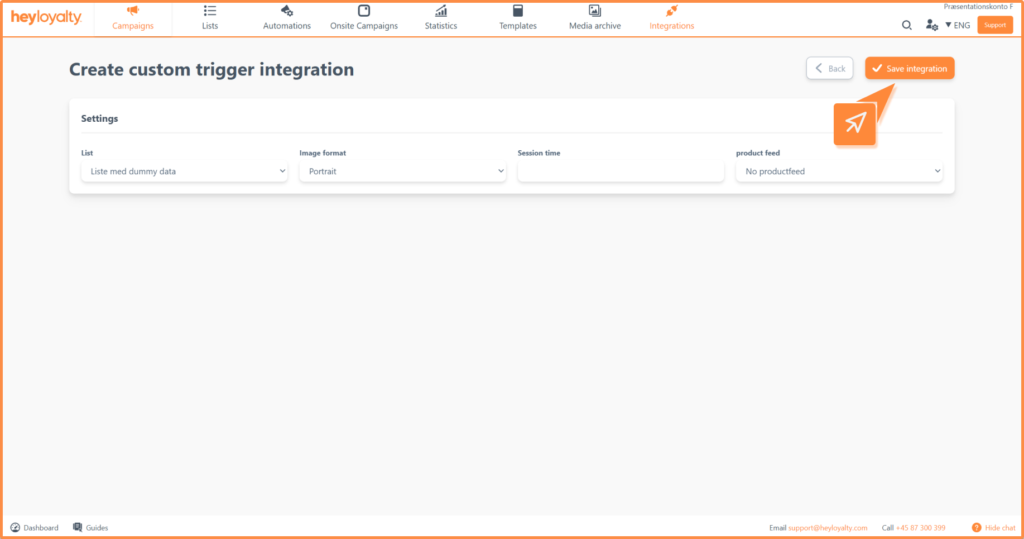
Fill in the fields so they match the correct list. The session time and product feed fields are optional, as you do not need them for this.
To send an email through this webhook, you need to create an automation.
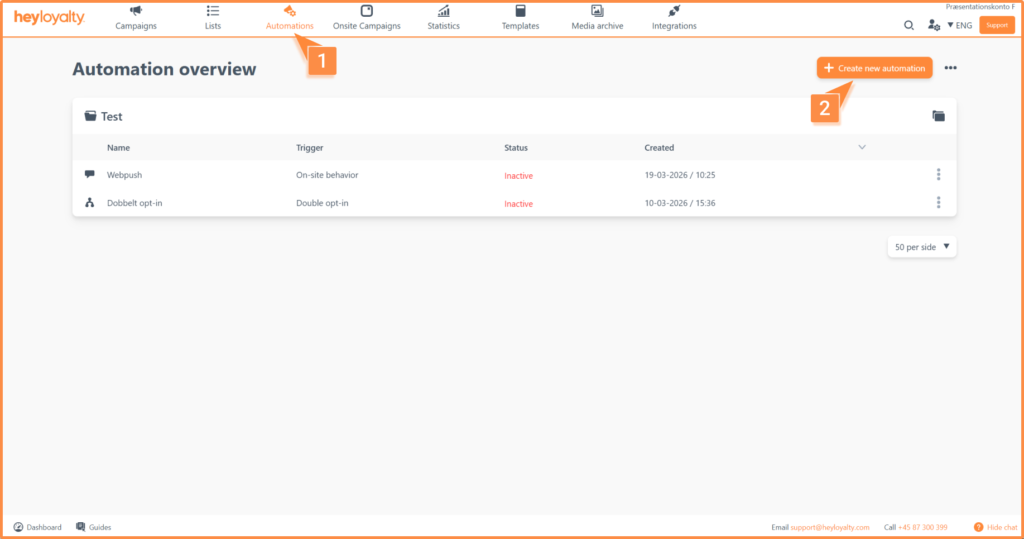
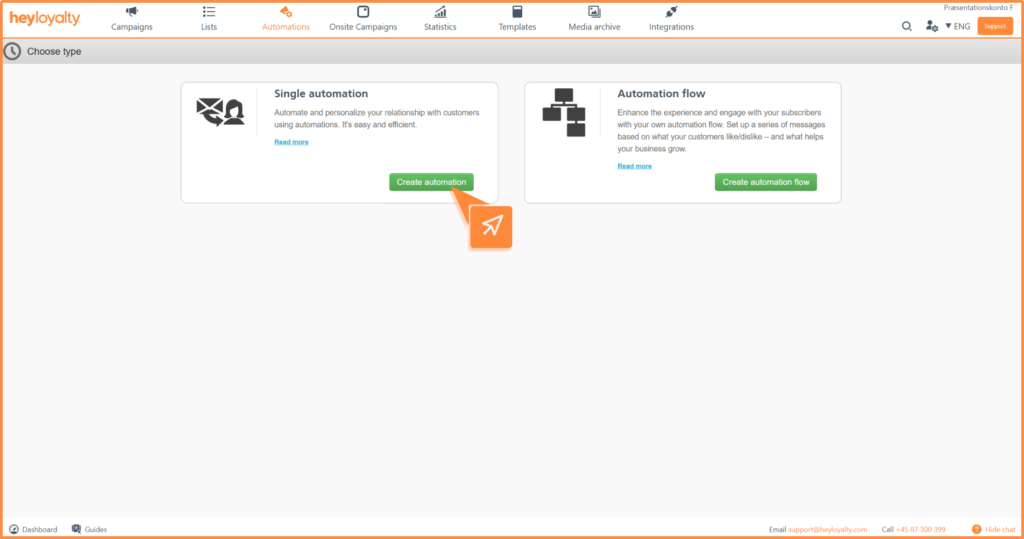
Click Automations → Create New Automation → Single Automation → Create Automation.
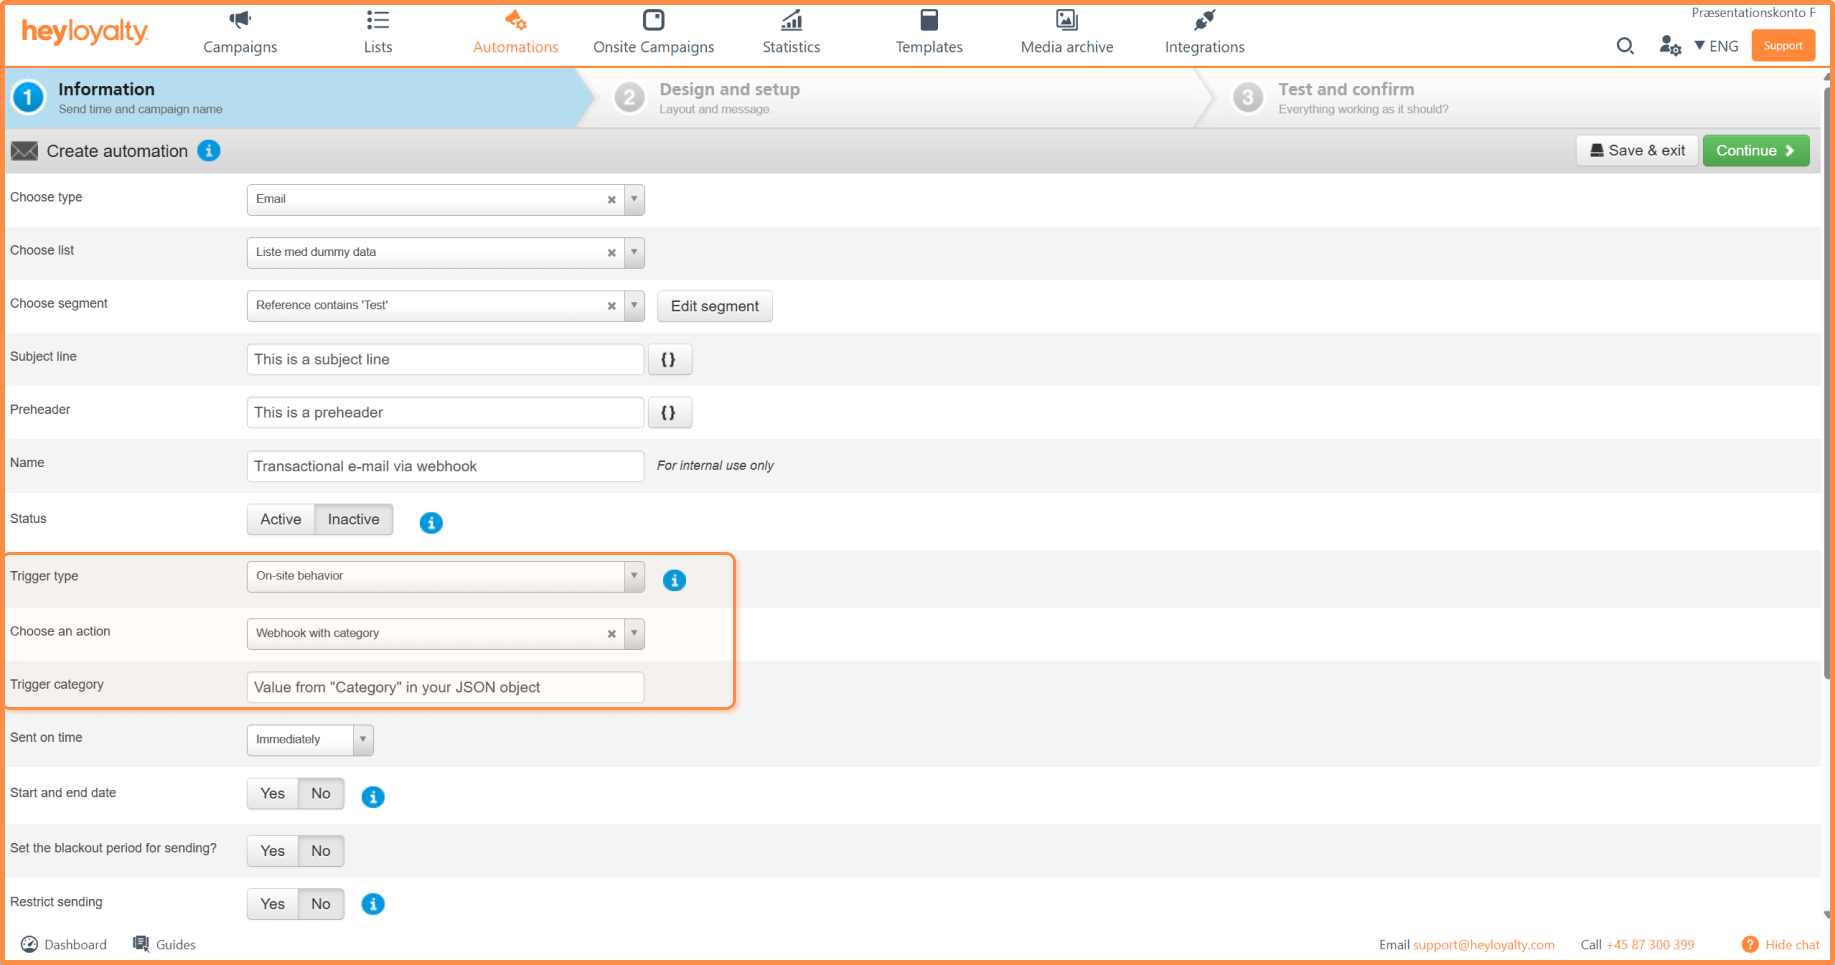
Fill in the information, select Onsite behavior as the Trigger type, and then select Webhook with category next to Select action.
The trigger category should be the value from “Category” in your JSON object.
To find the exact value, you need to know what the category is in your JSON object. If you did not set up the webhook and integration yourself, ask the person responsible in your organization for help. Heyloyalty cannot help with this.
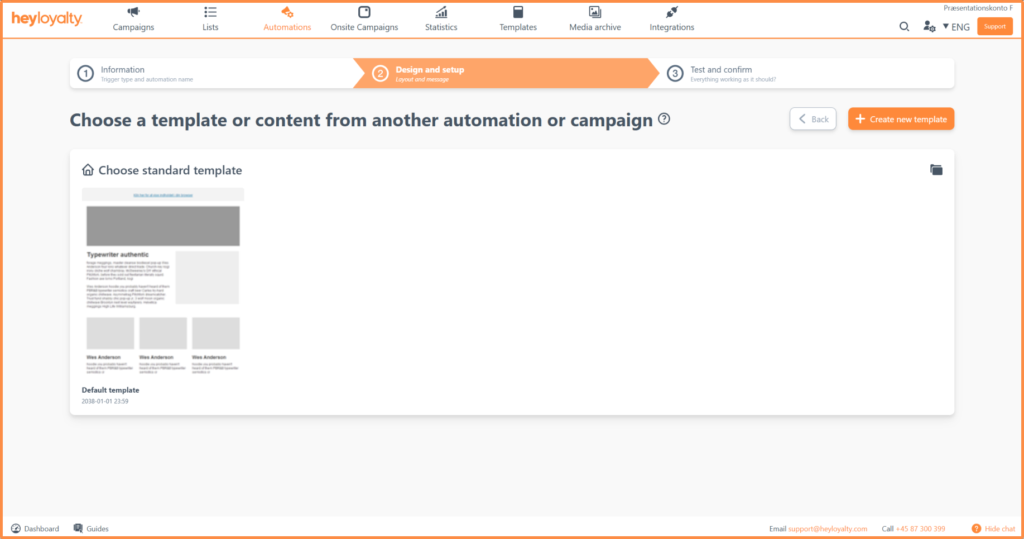
Click Continue, choose your template, and design your email.
As described above, you can merge personalized content into the email. For example, it can be the recipient’s first name, the date of the event, the order status, or something completely different. You must type the merge field manually. Heyloyalty cannot give you the exact merge field, but it will always have the structure {ExternalFields.TheNameOfTheMergeField}, where TheNameOfTheMergeField is the name used in your JSON object.
If you need information or help that you cannot find here on the guide site, you are always welcome to contact our support! support@heyloyalty.com
Need Support?
If you have questions you can't find answers to here, you can always contact us at support@heyloyalty.com