
In this guide, you’ll get a basic understanding of how to set up your campaigns and flows in our editor.
We won’t go through all features in detail, but once you’ve been through the entire guide, you’ll have a solid overview of how the editor works.
The guide covers, among other things, template selection, inserting cells and content, using the block splitter, special elements and add-ons. We also explain the general settings for your email.
Template
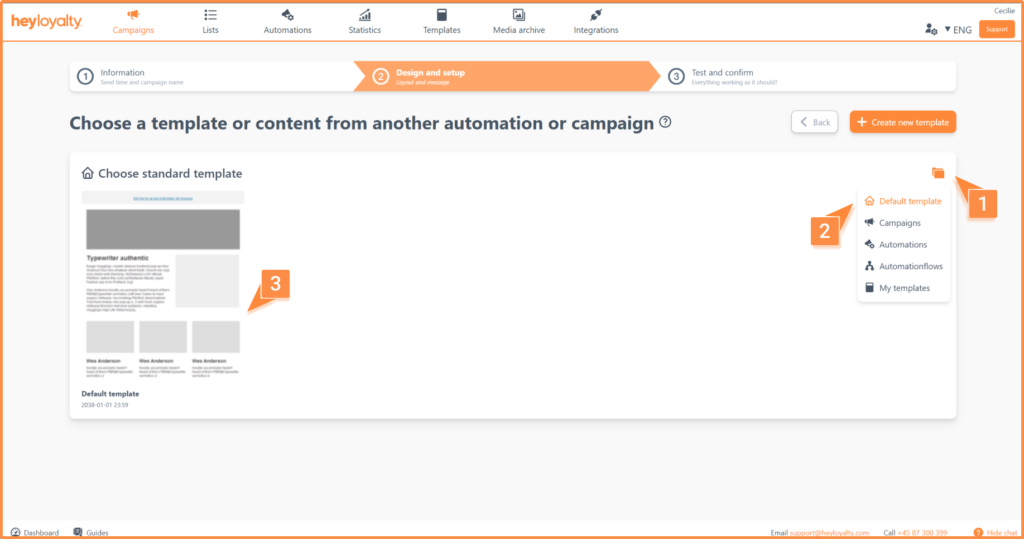
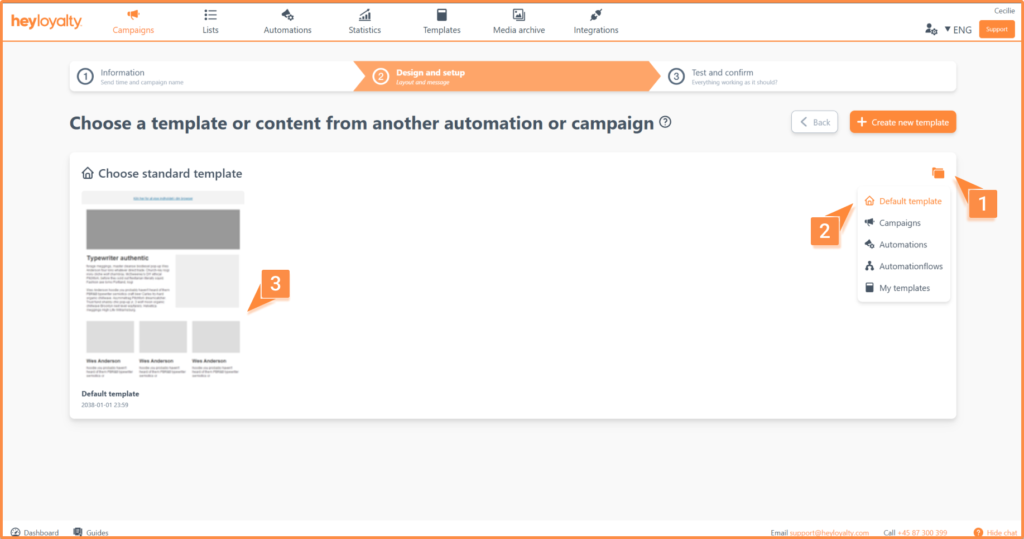
When you need to set up a campaign or flow, you must first choose a template.
If you want to build your own template in our editor, you should use our standard template, which you can find here:
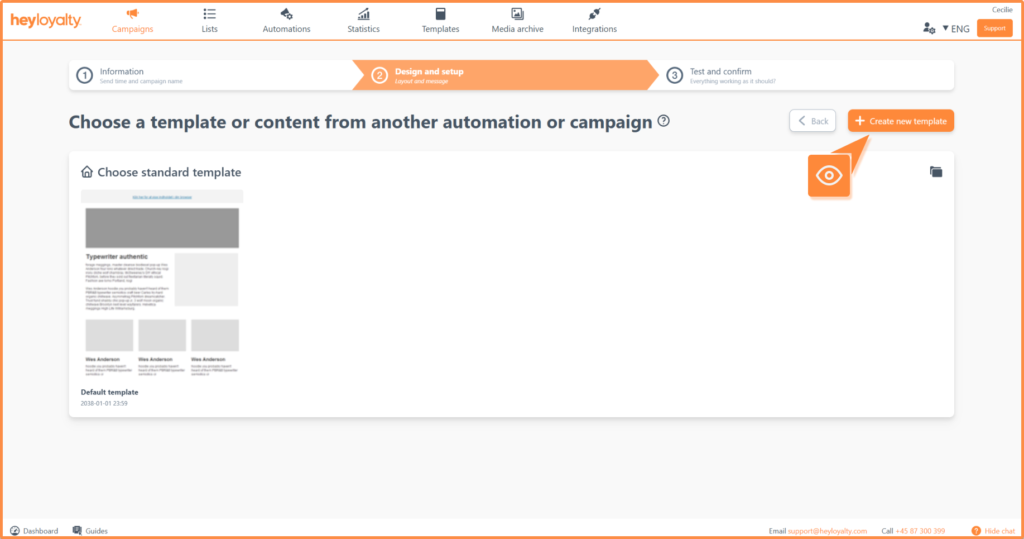
If you would rather use a custom template, it needs to be coded in HTML by either our developer or your own developer. You can create it by clicking here:
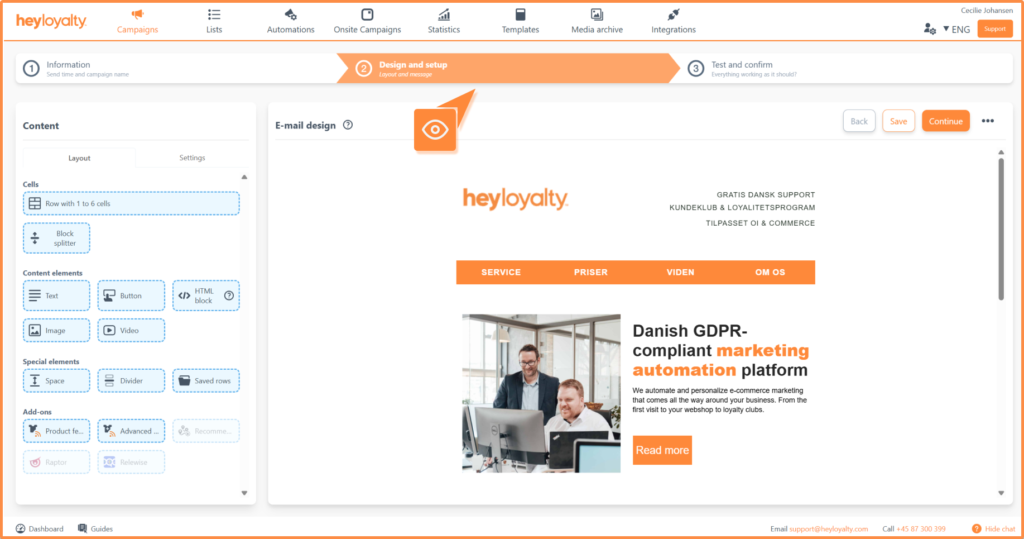
Editor – step 2
Once you’ve chosen a template, you proceed to design the content of your campaign. Here you can insert cells, content elements, special elements and add-ons. At the same time, you get a basic overview of your campaign setup.
Cells
To insert a content element, you must first create a row. You do this by clicking Row and dragging it into your newsletter:
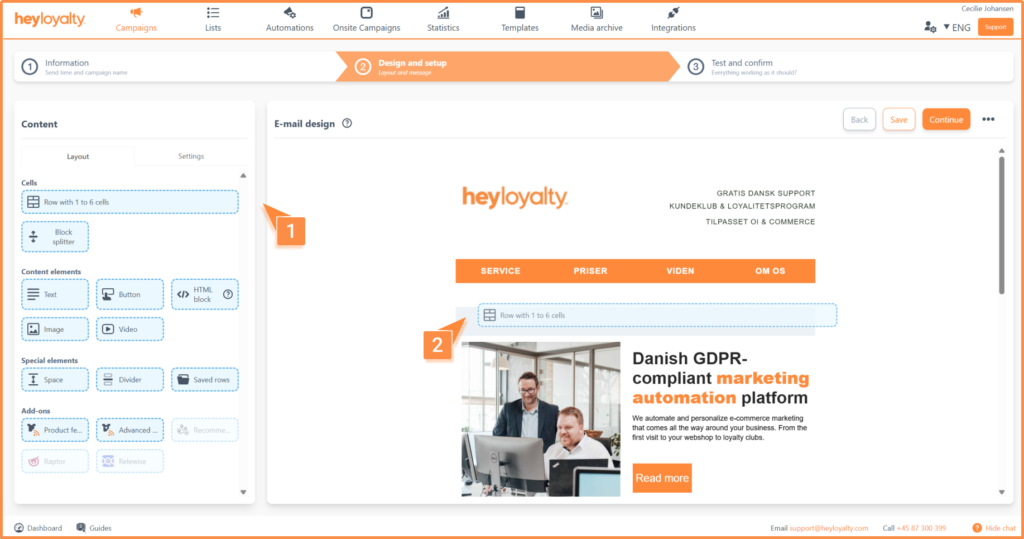
Once the row has been added to your campaign, you choose how many cells it should be divided into. Here, you select the cell division that fits the content you want to insert.
If you want to adjust the width of a cell, you can do so under Cell Settings, where you enter the desired width:
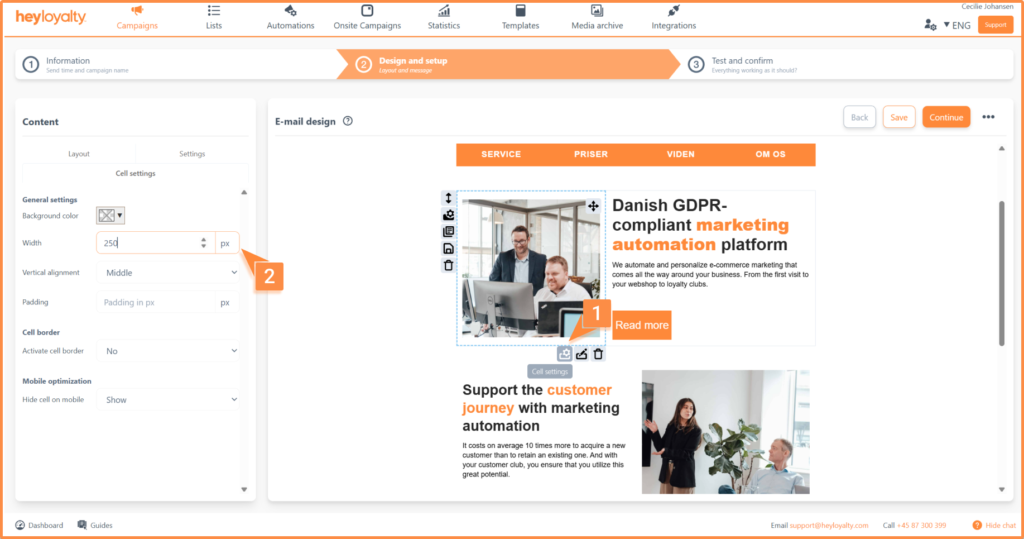
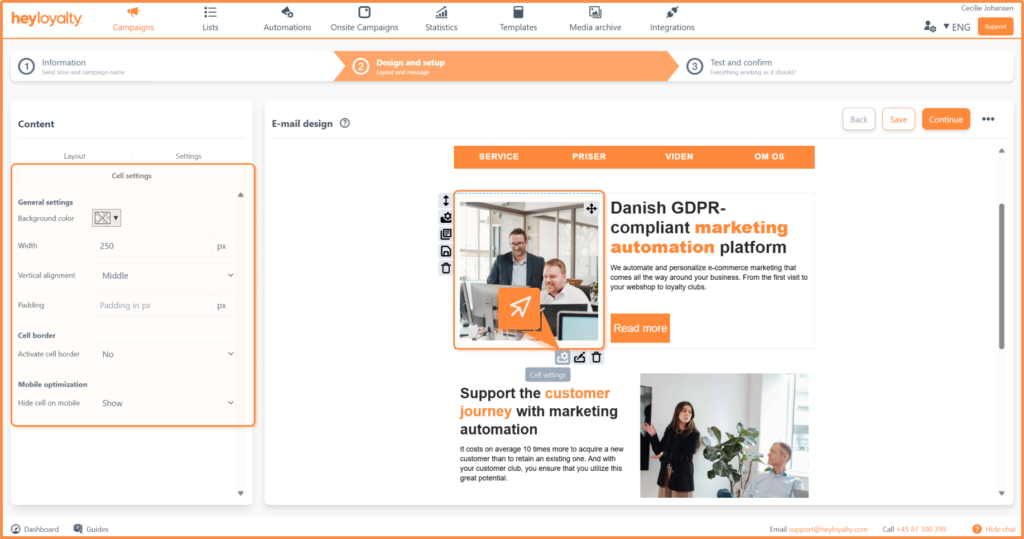
Under Cell Settings you can also change alignment, add padding (spacing) and determine whether the cell should be displayed on mobile:
If you want to customize the entire row, click Row Settings:
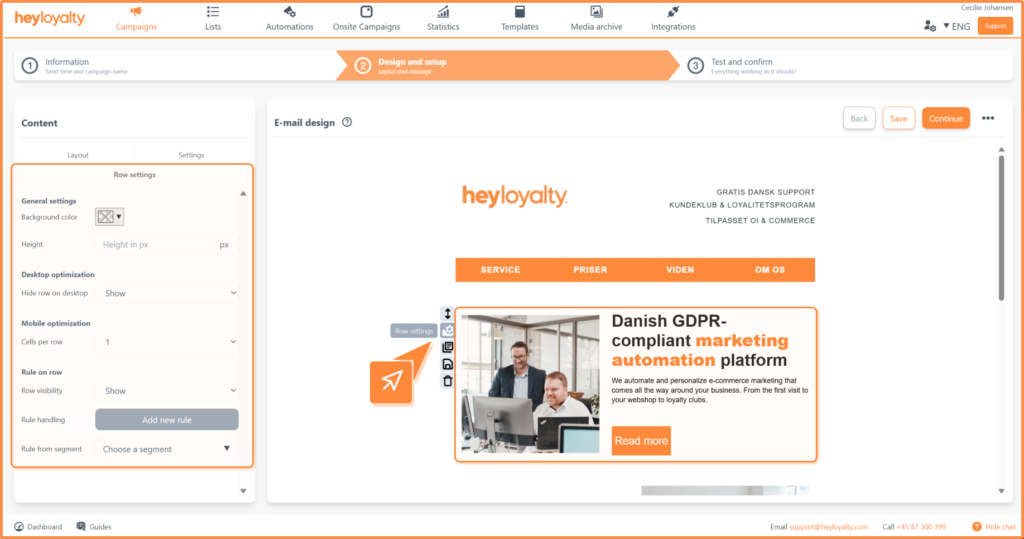
Here you can change the row’s background and height, choose whether the row should be displayed on desktop and set up rules for the row. Read more about how to create a rule on a row here.
Content elements
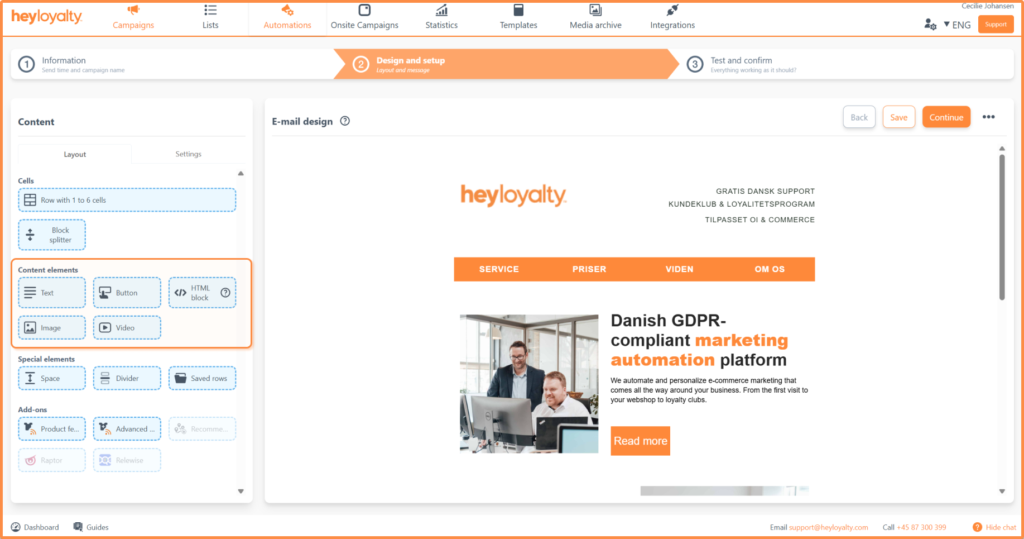
In your cell, you can insert content. You add content by clicking either Text, Image, Button or HTML and dragging the element into the cell.
Text
When you insert Text, a box opens where you can, among other things, choose font, font size, color or insert a link:
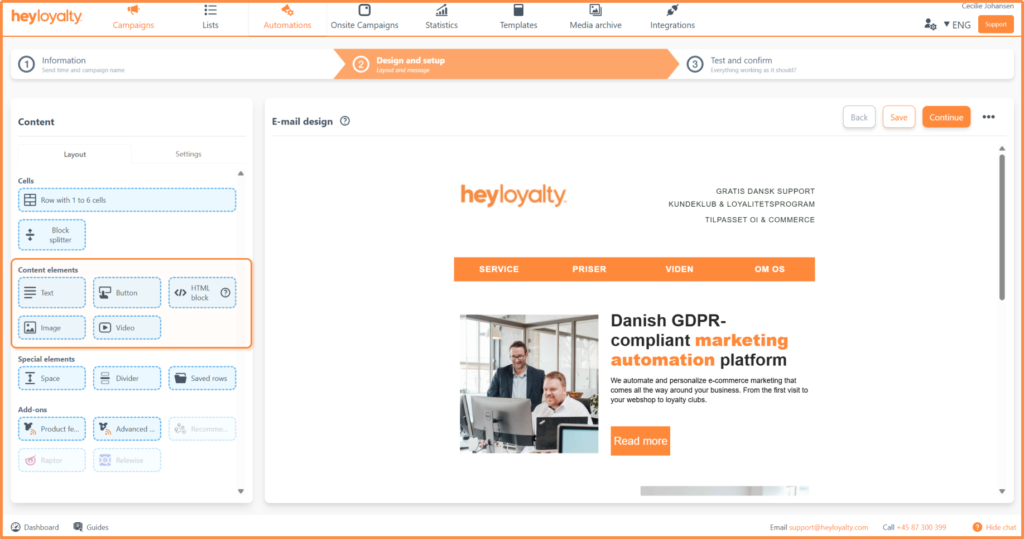
Here you can make use of merge fields. Merge fields add dynamic information about the member or company – insert, for example, the member’s name, the company’s address or the name of the company.
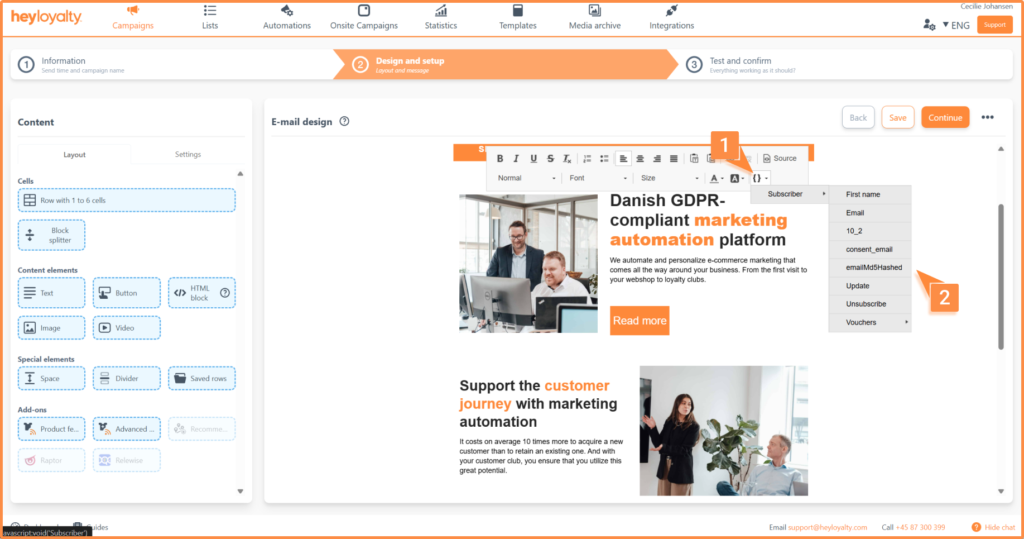
To use merge fields, you need to have the relevant information on your members, which is created in the list. We have created standard fields, but you can also create your own personal merge fields.
Button
If you insert a button in a cell, you can change the color, edit the text, or customize the font or font size. This is done under Button Settings:
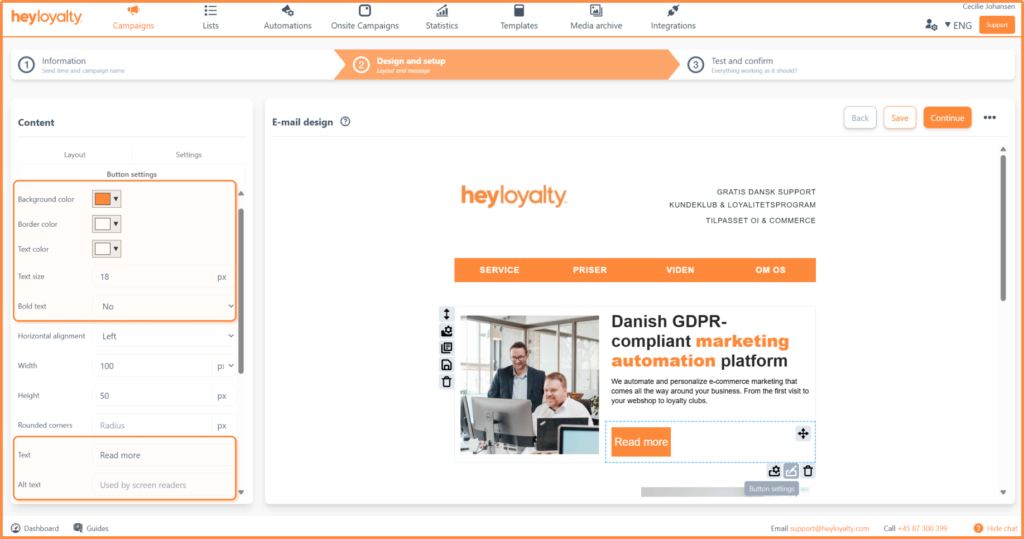
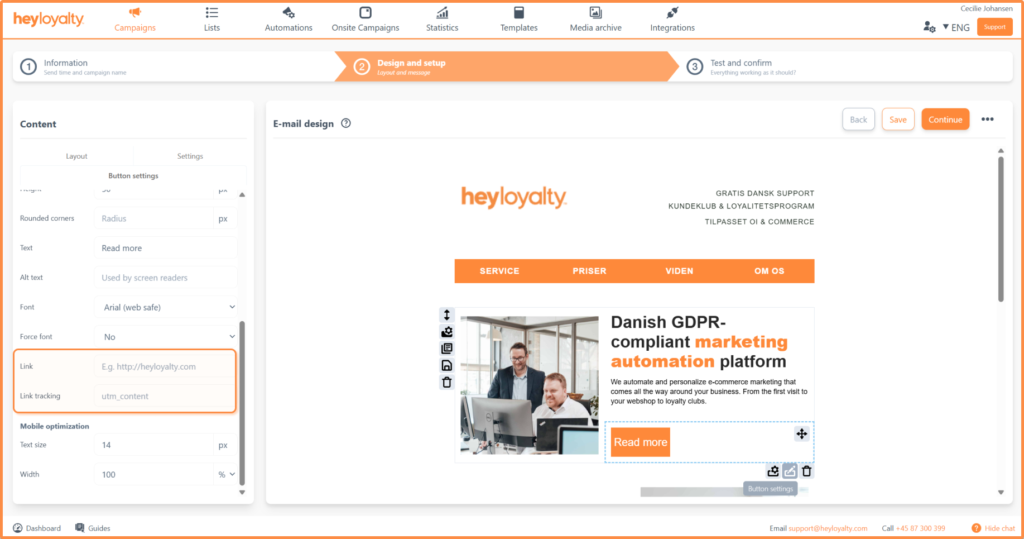
Under button settings, you can also customize the height/length of the button and choose whether it should have rounded corners. You can also insert a link on the button here:
Images
If you insert an image, you can choose from your media library or upload a new one.
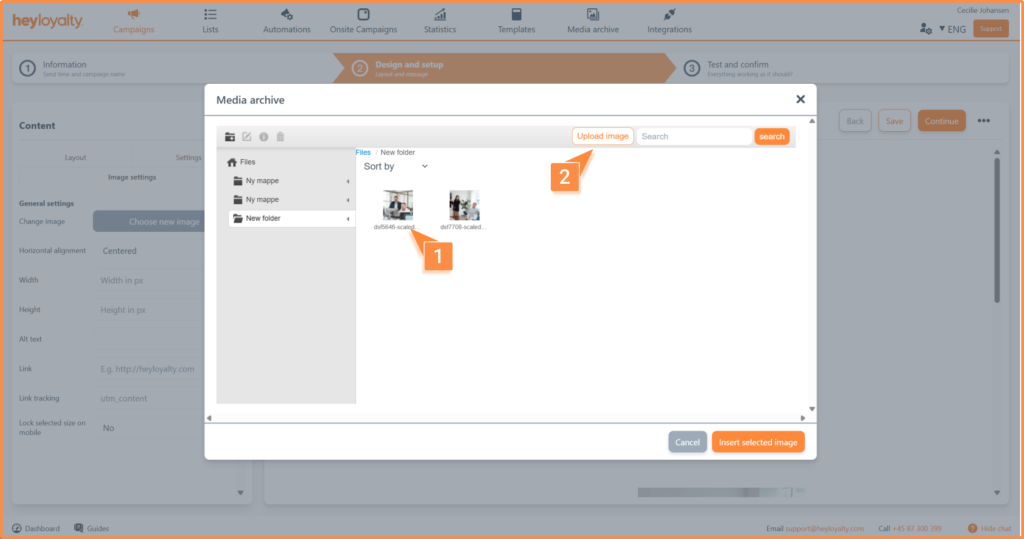
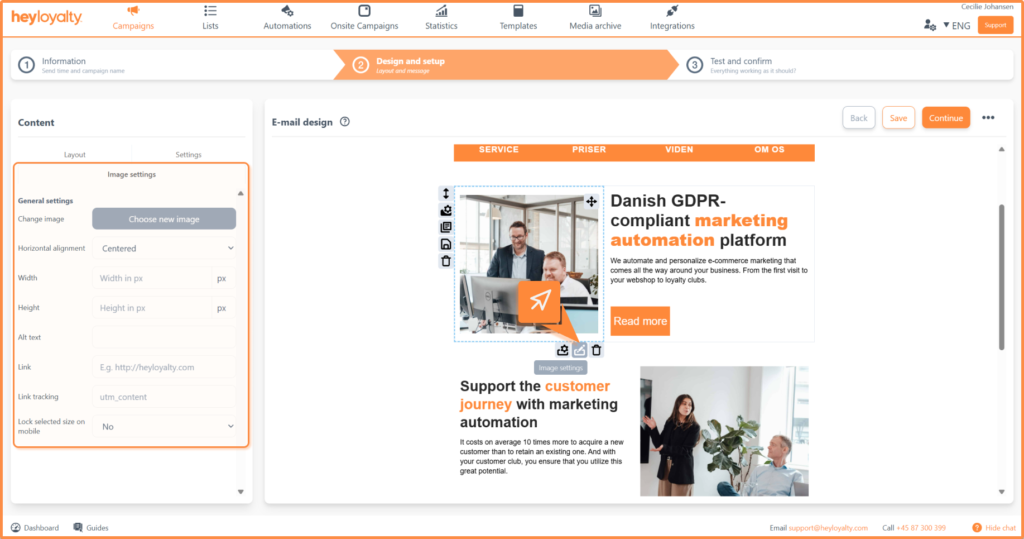
You can change the image settings by hovering over the image and clicking image settings below the image. This lets you, for example, change the alignment or size, or attach a link to the image.
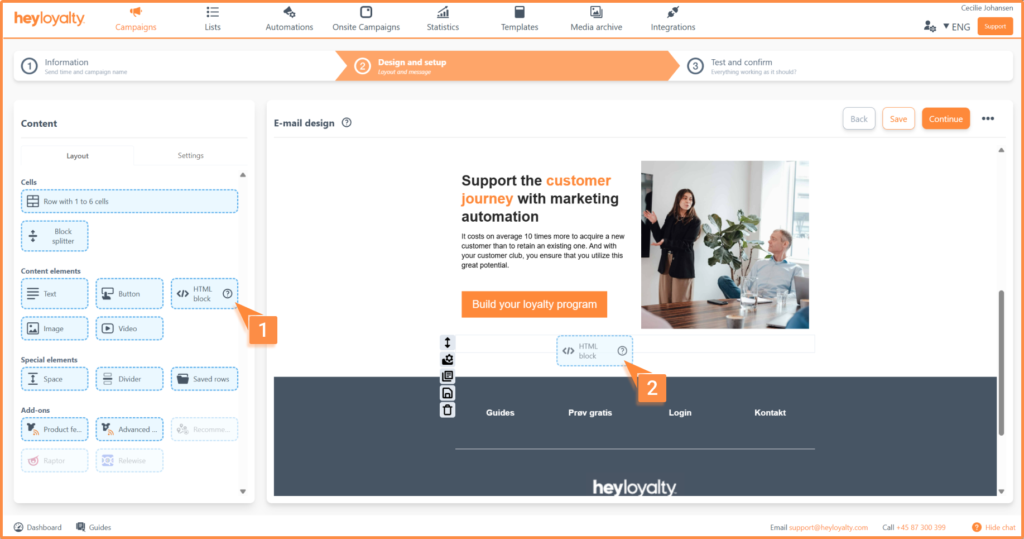
HTML block
When you insert an HTML block, you get the option to add your own HTML code, which is then displayed in the campaign. This block can, for example, be used to insert interactive elements like Google Maps. However, we only recommend using it if you know HTML:
Block splitter
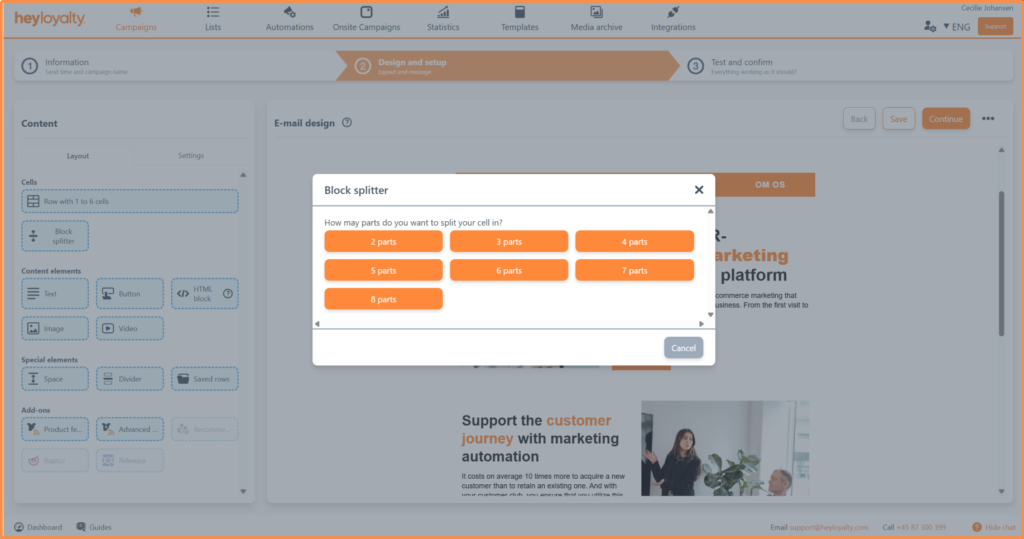
Block splitter gives you the option to split the blocks you have inserted in your design. This means that the selected cell can be divided into multiple vertical rows.
When you place a block splitter on a cell, you need to choose how many rows the cell should be divided into:
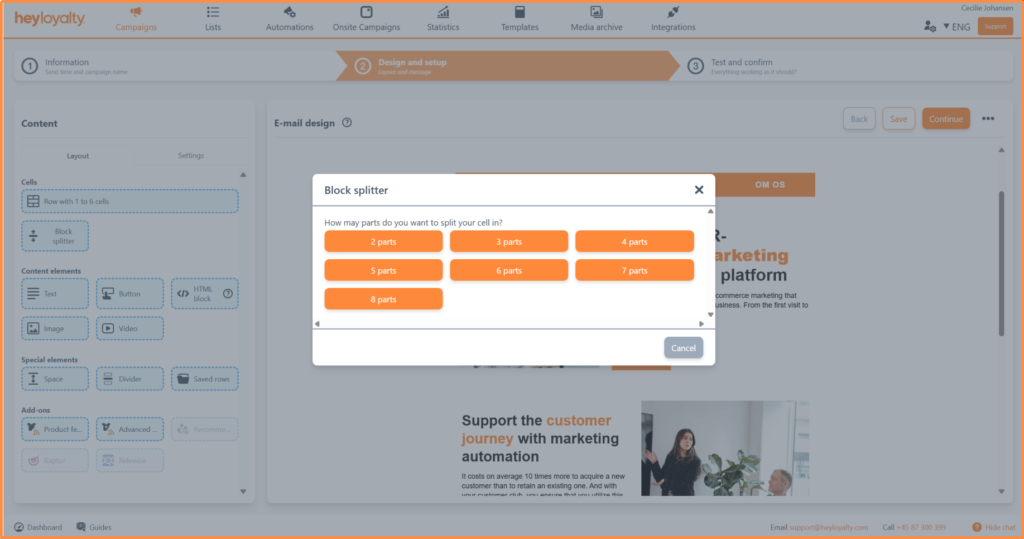
Once you’ve selected the desired number of rows, you can insert content in each individual cell.
Special elements
If you want to insert a special element, you don’t need to insert a cell first. Special elements can be added directly to your campaign, as they will always fill an entire row.
Below you can read how to use the elements Space, Divider and Saved Rows.
Space
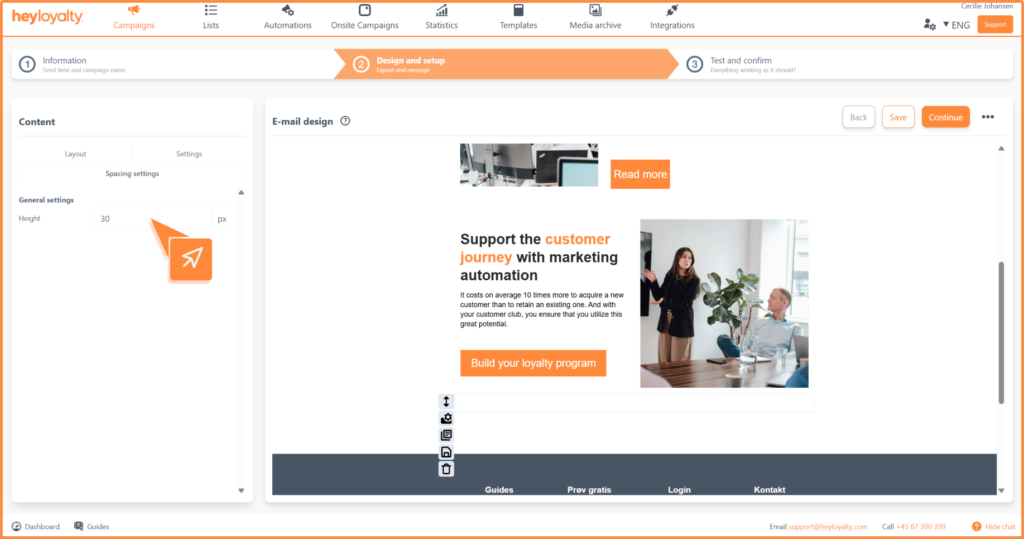
This element is used to create distance between your rows. When the element is inserted, you can adjust the height of the spacing via the element’s settings.
Divider
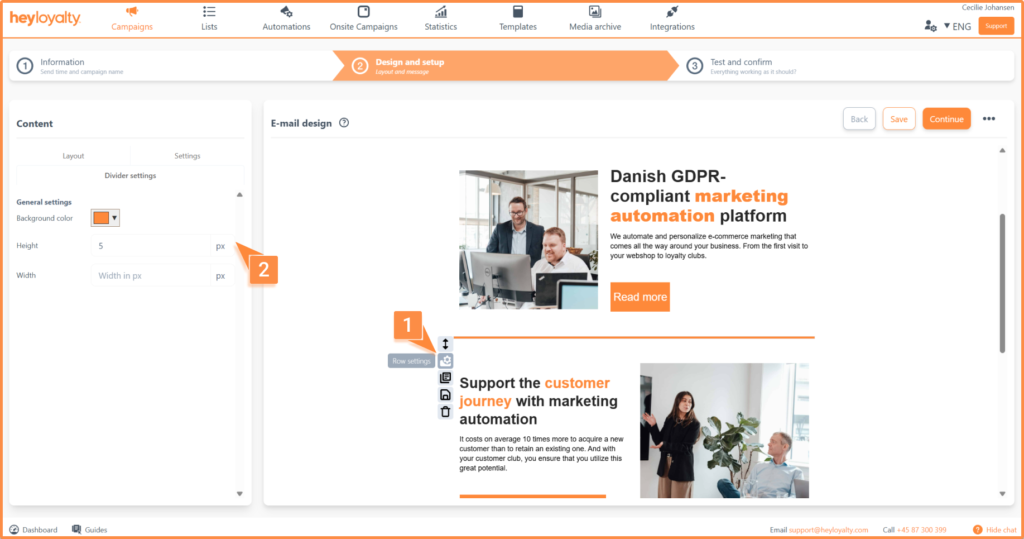
This element can be used to insert a line between your rows, so you can separate the content in your campaign. Under the settings, you can customize the divider’s color, width and length.
Saved Rows
With Saved Rows you can save elements in the designer and reuse them in other campaigns or flows.
To save a row, click the save icon on the left side of the row:
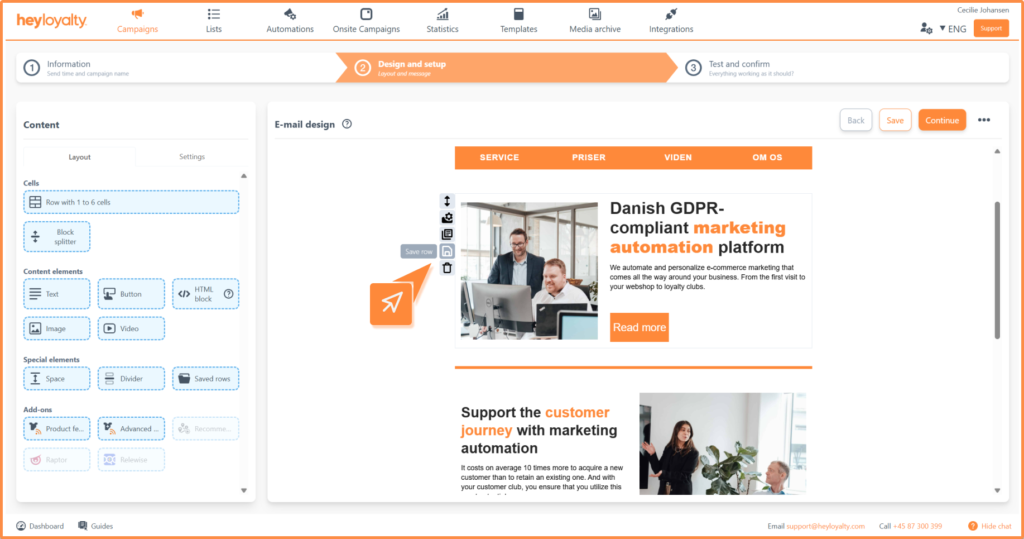
Then you choose a name for the element and specify where it should be saved:
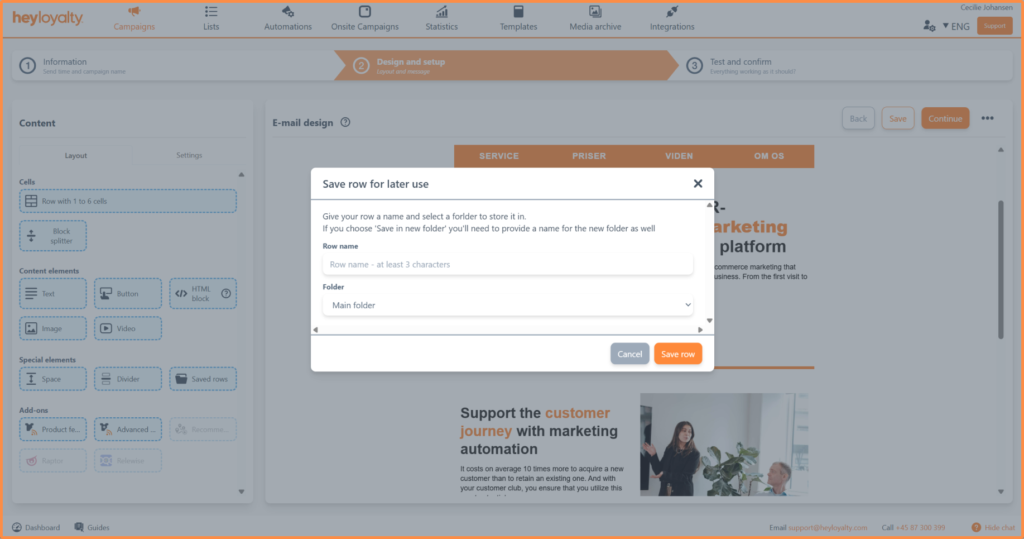
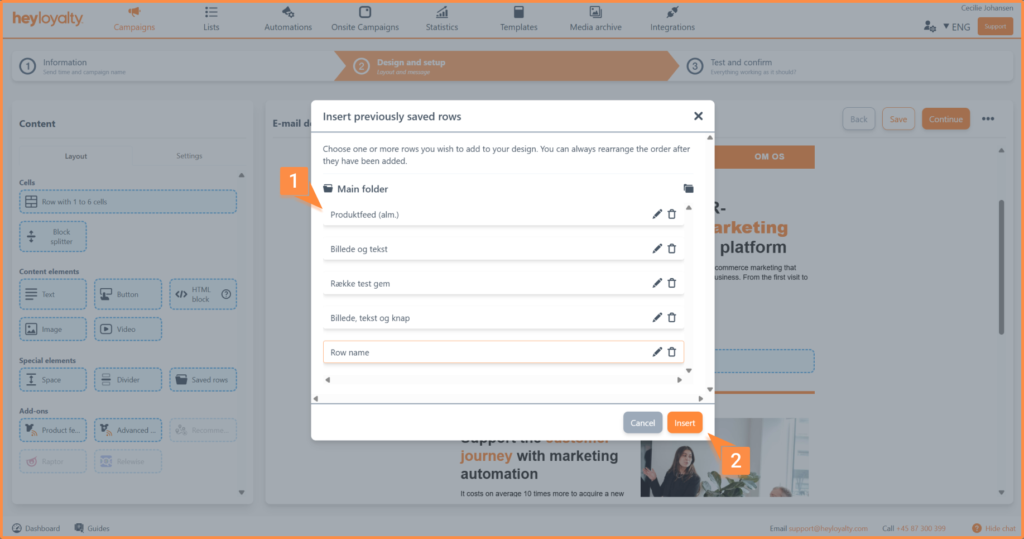
When the row is saved, you can find it under Saved Rows.
To see them, drag in the block called Saved Rows. A popup then shows your saved rows, and here you choose the one you want to insert in your campaign.
Add-ons
Under Add-ons you’ll find various blocks. You can only use the blocks that are marked in blue. If a block is grayed out, it’s because you haven’t purchased the functionality from Heyloyalty.
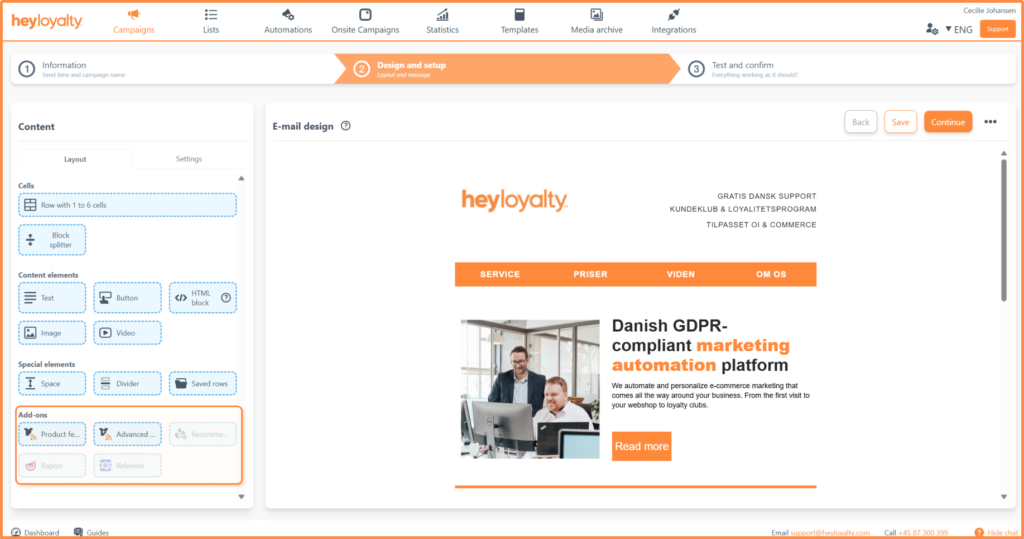
The most commonly used add-on is Product Feed, which you can set up in two ways:
- Product Feed: Here, you choose yourself which products should be displayed in the feed.
- Advanced Product Feed: The system automatically selects products based on the search criteria you have specified for the product feed.
See here how to create both a regular product feed and an advanced product feed.
General settings for your email
The general settings for the campaign can be found under the Settings tab:
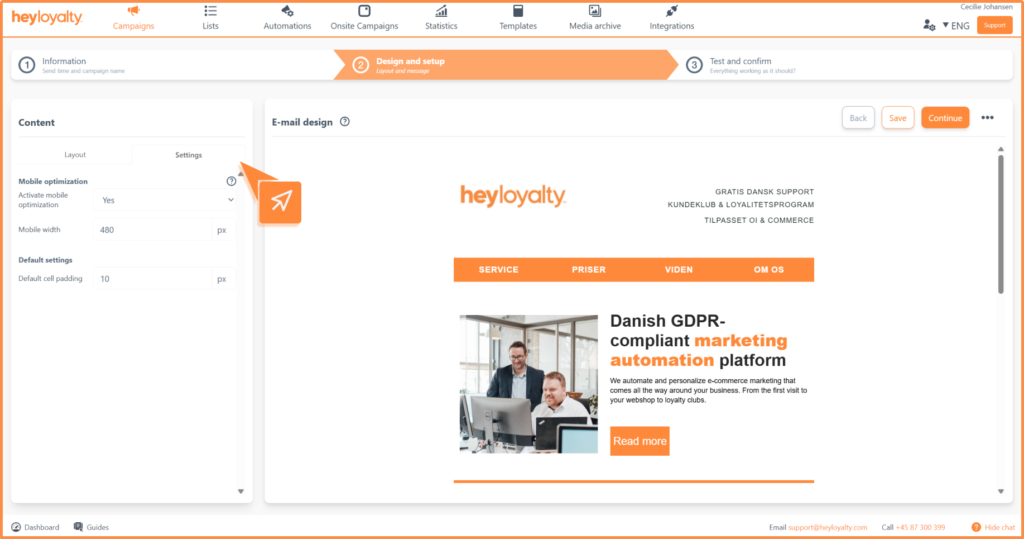
Which settings you see under this tab varies. If you use an HTML template, you will see fewer settings, as they are defined in the template. With a standard template, you will see more settings.
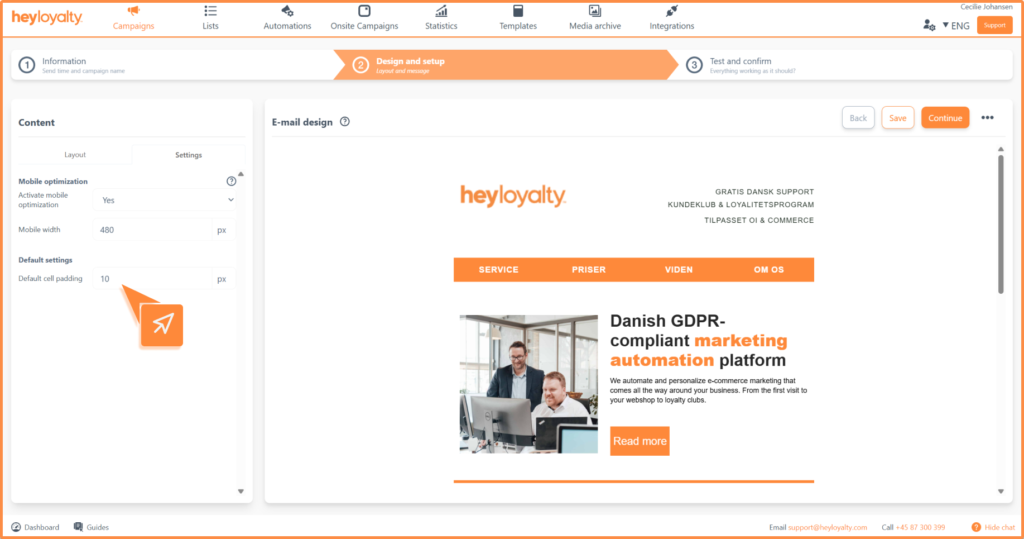
Under settings, you can set spacing, enable mobile optimization and set the mobile width and standard cell padding.
If you want overall spacing (padding) in your campaign, you can set it under settings, which you can find here:
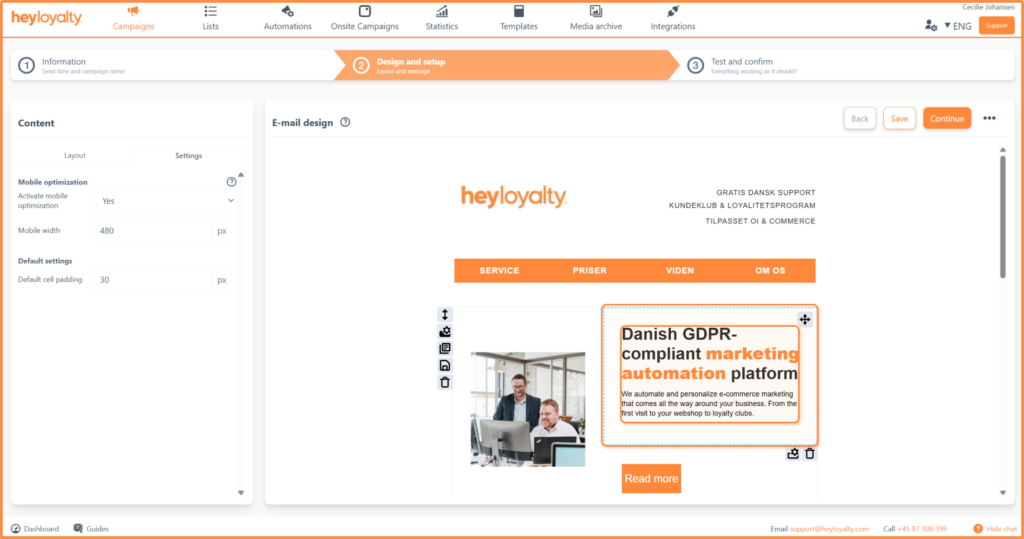
When you add padding under settings, it is applied around the content in all your cells, as shown here:
Under the three dots (•••) in the right corner you’ll find various save functions:
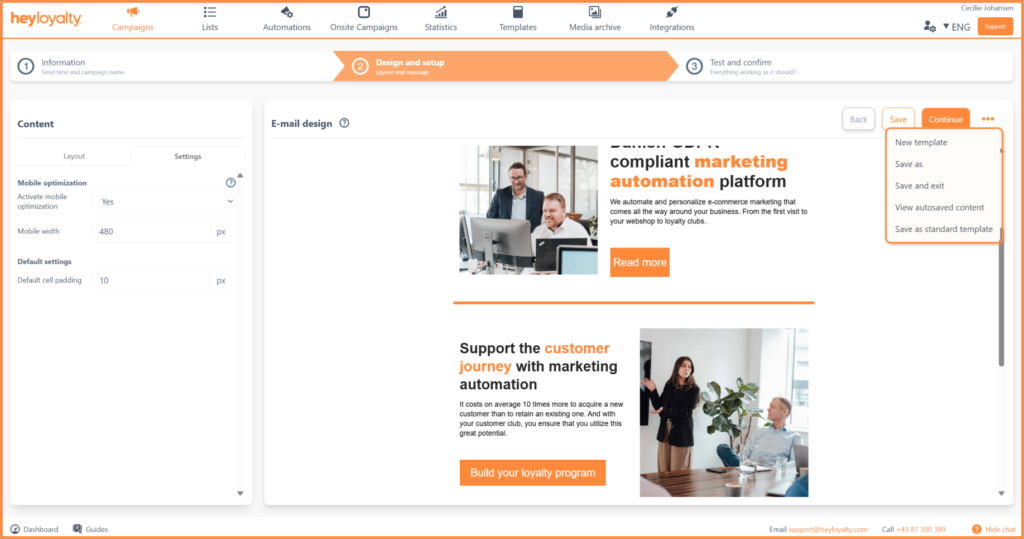
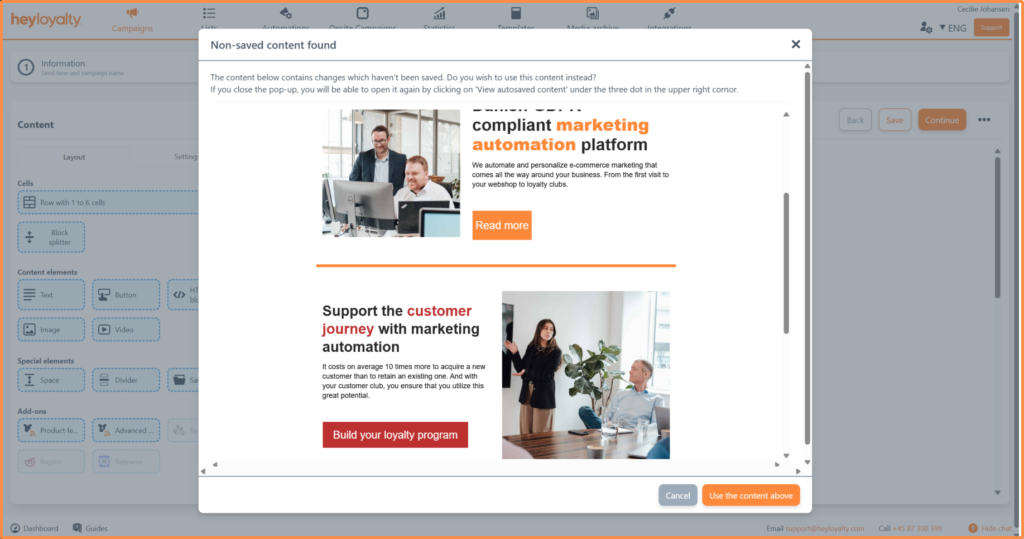
Here, you can save the content of your campaign and access your automatically saved content. We automatically save every minute. If you leave your campaign after a minute and return to it later, you will see a popup like the one below.
Here, you can see the auto-saved content and choose whether to keep the new content from auto-save or continue with the previous version you were working on.
In the menu with the three dots, you can also save a standard template, which saves all the content in your campaign. Once you have saved this standard template, you can use it in campaigns and flows.
When you build a new campaign or flow, you will be able to find your standard template here:
Summary of Step 2
You now know the fundamentals of how to set up your campaign, how to place content in your email and which elements you can insert.
As mentioned, the setup of emails in step 2 works exactly the same way in flows. You can read more about how to create a flow here.
Now you’re ready to send campaigns to your members and generate more sales of your products! We recommend that you make your campaigns targeted. You can do this by dividing your list into segments, so you can send campaigns to specific groups – for example, to those who are interested in a particular area, or who have previously bought specific products.
Read more about how to create a segment here.

If you need information or help that you cannot find here on the guide site, you are always welcome to contact our support!
support@heyloyalty.com